The Supply Store
Back to YouCanDraw .Com
Shapes and Masses of the Head |
In this section, we're going to delineate the lower part of the face into it's more specific parts. We started adding the nose as a mass at the end of section 6:
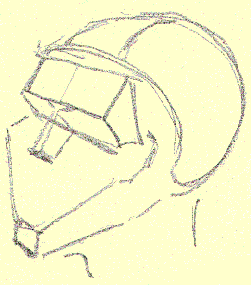
Before we added the mass of the nose, we had talked about the three other major masses: the forehead, the entire lower face, and the cranium. Here we're going to break apart all that into smaller parts. Why? First, because it's literally there. Secondly, the more you know, the more you're able to see into someone's face, and the more accurate your drawings will become. Additionally, the more detail you recognize in somebody's face, then the more options you'll have to exaggerate. We'll focus on mass number two of the following illustration - it's the lower part of the face:
We're going to isolate mass #2 |
The isolated section |
Out of this section, the isolated section, we're going to construct a jaw bone, and a cheekbone mass, and a cylinder - the cylinder of the maxilla.
The jaw
Let's start from the bottom and build our way up. Here's a jaw bone - the mandible if we're going to get all academic about it, (it's a fairly anatomical drawing):
The Mandible
As you recall, the mandible "articulates" with the temporal bone of the cranium. ("Articulates". That's the big medical word for describing where two bones come together and touch, like in a joint. Remember the song "Dem dry bones"?..."the foot bone's connected to the ankle bone, the ankle bone's connected to the shin bone..."? Well if we get academic about it, that song should go " the foot bone articulates with the ankle bone, the ankle bone articulates with the shin bone, etc., you get the idea. It is tougher to sing however.)
Anyway, the mandible articulates with the temporal joint and forms the "temporo-mandibular joint" of TMJ fame. (This is review.)
The point where the jaw bone touches the cranium
Representing the jaw in "wood block" form
In a three-quarter view, the mandible or jaw bone is an L-shaped undercarriage. If we give it the "chiseled from a block of wood" treatment, it might look something like this rough sketch:
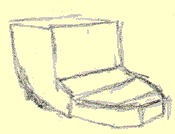
Block view of the jaw
Next we'll chisel a little more from the block view of the jaw, chiseling out a left and right vertical segment, and adding a rim of teeth to it:
Adding teeth and chiseling
out
excess
Adding the cylinder of the Maxilla
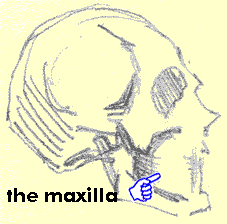
Pointing out the Maxilla
The next addition to the lower portion of the face: the maxilla. The maxilla is the cylindrical bone that houses the upper part of the mouth, holds the teeth, and the nasal sinuses. In the picture above, the finger points out the maxilla. In the picture three illustrations up, with the big "TMJ" and arrow, the maxilla is there but by omission. In the following illustration, it's being dropped on to the jaw (the mandible) almost like a motorcycle helmet visor, or like a catcher's face mask:
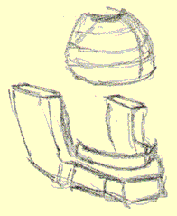
Here comes the good 'ol Maxilla
In the end, it'll fit right on top of the lower set of teeth and will extend from between the two cheekbones, (it's outlined here in light blue):
The maxilla in blue
How does the maxilla fit with the middle of the face, i.e., the forehead and cheekbones? Something like this:

Isolating the middle of the face
Now what would it look like if we added a chin? Check this out:
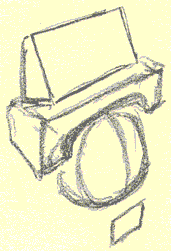
Adding a chin
A comparison
I want to do a comparison here. Look at the left cheek of this blockhead, (that's the cheek that's closest to the right side of the format. You know, format - the rectangle surrounding the drawing).

Look at the left cheek line
Look at the line that run's from the highest corner of the cheek bone down to the chin. (The blue pointer finger.) In the next picture I've superimposed this undifferentiated blockhead with the one just above, (the "adding a chin" illustration.). See how this line, the one that runs from cheek bone to chin, is mirrored in each picture?
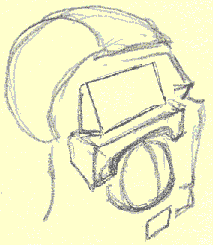
Seeing the similarity of cheeks
What's the point of this? It's to show you that even behind the simplicity of a simple blockhead, there's growing layers of complexity. Still, understanding and drawing the head as a group of blocks gives you an easy starting point.
The head is such an incredible piece of architecture - on a human or an animal or even an insect - that you really can't visually appreciate it unless you give it some serious study. I'm hoping that for the purpose of drawing an accurate head, these lessons help. This is more information than I ever started with, so I'm hoping I can help you springboard way beyond anything I've ever done. The more you know about anatomy and anatomical shapes, the better all your renderings will be - realistic or caricature.
Let's keep moving
In all, we've broken down the head into six basic shapes. Five of them are intimately involved in drawing the face. Those five parts are the:
forehead
cheekbones,
nose,
maxilla, and
jaw.
So let's review the five blocks of the face that we've carved from our imaginary wood block thus far and see how they might look before we combine them:
|
The five building blocks of the
face
Bringing together
the five blocks
and adding the cranium
Here are all 5 parts roughly coming together. (Look at the angle and mass of the jaw - it's a variation, but notice it still "works" - your brain still recognizes it as a face):
The 5 building blocks
together
Then we'll add a cranium to all of this and you have the latest, the greatest, the most highly evolved "chiseled from a block of wood" Mr. Johnny Average Head to date. Pick out and name the different parts. Go for it - I'll bet you can do it right now!

Adding the cranium
Next, we'll add a little hair - the "Johnny Blow Comb" look. I accidentally forgot to put a nose on this guy. Please forgive me. (Nobody gets something for nothing though, not even Mr. Average.)
Add a little hair - oops, lost
the nose
Add a little "philtrum", (that's that little fleshy canal / groove between the nose and upper lip). And lastly, we'll add a lip line. And guess what? You have a face that almost has personality:
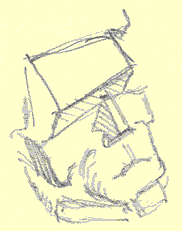
Philtrum and lip added
Assignment |
1) Draw your version of each of the following sketches. (Do four or five of each.)
1. |
2. |
3. |
4. |
2) Then draw the mirror image - of each illustration - so each finished drawing has it's very own opposite facing it, like this:

Draw a mirror image of each
drawing
3) Start paying attention to light and shading. Look at the sketch above (the "philtrum and lip added illus.) and observe the cross-hatching.
4) Draw the full face within the miter box. Go quickly. Go slowly. Please, just do do them. And in no time you'll be getting the hang of it.
What's left? Start adding the features. And how are we going to do that? Since this is a cyber-book on caricatures, guess what? We'll do it by looking at and studying caricature's. Yes, it's finally time to start doing caricatures!
BUT, and you knew there had to be a"but", review the next section on "Shapes of the Head, Part VI: Mr. Johnny Average face ". We'll be adding the vertical lines to the horizontal lines you've already learned. This will be the final map of comparison that you'll internalize and use as a reference for deciding on what's caricaturable on somebody, (if it isn't obvious.) We'll be coming back to it often as we we start analyzing caricatures - so don't worry about memorizing it right away - you'll memorize it through repetition.

Three of the horizontal guidelines of the face
A few extra pictures:
|
|
Superimposing a maxilla (imagine the placement of the nose).
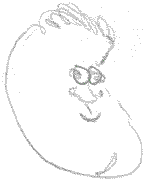
Abstract the blocks you
visualize in this face
Kasbohm & Company's
YouCanDraw.com
© Copyright, All rights reserved 1997
e-mail: jeffkaz@YouCanDraw
