
The Supply Store
Back to YouCanDraw .Com
Shapes
and Masses of the Head |
More Mr. Johnny Average Head
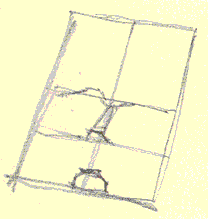
Did you get a good start at filling the "miter box"? Did you feel a little exhilaration as you saw and "felt" the head start taking on shape and depth? If not, here's a suggestion: treat the miter box as a "grid" and just draw each little section one at a time.
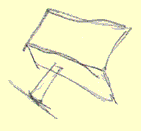
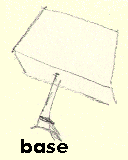
Remember the way it was broken down in the previous lesson, (section 5)? Just treat each rectangle within the box as a unique and complete composition. Then look at each line within those rectangles as being part of distinct and different shapes within each rectangle - anything becomes simple if you break it down to it's most elemental basics. Here's an exaggerated example of what I mean:
Taking off on the Johnny Average Head "blockhead"
In this section we've got a lot to do. So let's jump right in. The purpose of the "miter box" is to help you get a feel for the masses of the head. In the next set of pictures, we're going to "mass them out" a little more. By that, I mean we're going to abstract the head into "chiselable" chunks. A little farther on, you can chisel them down into more realistic faces. But for right now it's time to start building a repertoire of "Johnny Average Head blockheads".
Blockhead 1 |
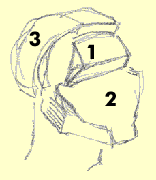
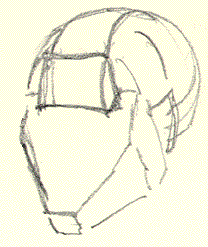
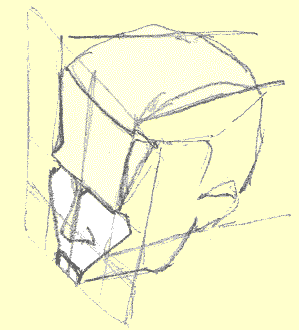
In these two sketches above I've started "massing out" the 3-d face from section 5. The feel I'm looking for is a "chopped from a wood block" effect. In "block face 1" there are three main masses and a neck.
- Mass #1 encompasses the forehead and eyes.
- Mass #2 is the combination of cheeks, mouth and jaw.
- Mass #3 is the main mass of the cranium.
Just for fun: Look into one of your filled-in Johnny Average Head miter boxes and imagine you see these 3 masses in it. Color in the 3 masses. Is there a purpose to this? Yes. It's to get you seeing through smooth shapes (like a real persons face) and impose a structure.
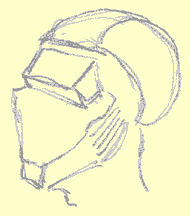
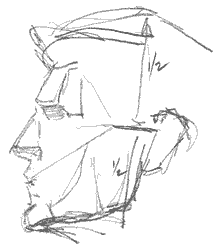
In the next two illustrations, notice the different shapes of the mass used for the forehead. Compared to block head 1, blockhead 2 has got a curve to it as opposed to the more angular shape of block head 1 and blockhead 3. Notice also how the forehead transitions into the cranium in blockhead 2. (It's still made up of three general masses. Try to find them).
Also notice how the second block, (just like number 2 in the illustration of blockhead 1 in the blue box above) the one that encompasses the cheekbones, the mouth, and the jaw, forms a base the forehead rests on. Look at it some more in the next two illustrations:
Blockhead 2 |
Blockhead 3 |
Assignment I: drawing "blockheads" |
- Draw 5 "blockheads" like you see in the 3 previous illustrations. Draw them first without the miter box,
- Then draw 5 of them with the miter box.
- Lastly, draw 5 more without the miter box.
How did they look when you drew them without the miter box? When you redrew them with the miter box, did they shape up? And did you find that when you went back to drawing them with the miter box you were using and referencing the guidelines a whole lot more? Did you find that after you drew them with the miter box, they shaped up a little? See - you're paying attention! That's great.
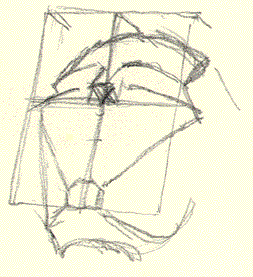
Start adding the nose
Out of the forehead arises the root of the nose. It projects down to just above the lips to the "base of the nose line". Also notice in the next picture the subtle effect perspective has (it's sending it's trajectories to the vanishing point well off the screen to your left).
Adding the nose
And for your viewing pleasure, I'll just graphically clarify what I mean by root and base of the nose:
Picture 1: root of nose |
picture 2: base of nose |

Note: This section is to get you drawing the masses of the head. If you want to see more detail on the features (like the nose) go back to the Lessons Library or see Lesson 11: Drawing Noses .)
In the overall scheme of things, the nose lines up on the vertical canter line in the front plane of the face. It fits between the eye line and the base of the nose line. It projects out past the front plane of the face and, again, comes to rest on the "base of the nose line. In the illustration just above and in the illustration just below, pay close attention to how all the lines of the front view format you've learned still exist and are used in these pictures:

Adding a nose to Mr. Average
Assignment II: drawing "blockheads" with a nose |
Very simply, add a nose to your Mr. Average Head's miter box drawings from the assignment you did just above. (Remember, you got to do the drawings for this to work!) Click here for adding nose animation.
Playing with perspective
Now, we're going to play with the perspective a little in the following group of pictures. How do we do that? By building miter boxes that are sometimes wide at the top, sometimes wide at the bottom. Sometimes they're getting skinnier as we go off to the left, sometimes they're getting skinnier going off to the right.
The idea is to play with the miter box - add all the guidelines you've learned, then fill it in with a "blockhead". If your proportion isn't exact, then you have a "one-off" (as in "one-off Broadway") rendition of Mr. Average head. And you know what that means? You've started your first caricature! And that's why we're all here in the first place, right? Study, then draw these illustrations, but most importantly, draw your own distorted 3-d miter box - or one with dramatic perspective - and fill them.
Looking down on Mr. Johnny Average Head
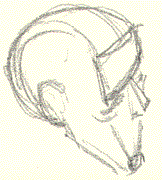
Looking sideways at a beefed-up Mr. Average
Looking up at Mr. Average -
and
there's a goof here
Did you find the goof? Here's a hint: the base of the nose line is drawn at the middle of the picture (where the eye line ought to be). Still, it works. Can you figure out why? (answer: because there's a whole bunch of head out of sight above the top line of the miter box - the miter box cuts off the top about half of the upper half of the face.)
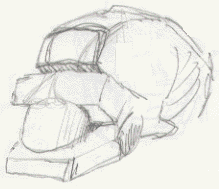
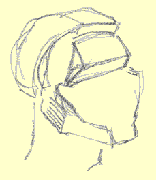
In the profile of Mr. Average, the "beefed-up" picture, there's a little more detail than just in your average blockhead - it's closer to a portrait. In upcoming sections, we'll be getting into more advanced detail. If you can master the concepts on this page and in this whole section "Masses of the head", you'll have acquired a very firm foundation allowing you a great deal of flexibility - and accuracy.
Some more views:
|
|
|
|

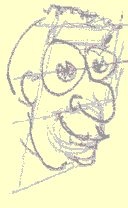

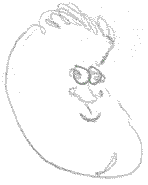
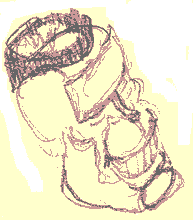
Can you find the imposter?
Try to impose a miter box on this character...
 ...and on this one |
...and this goofy guy |

Go
to section 7,
(Actually a direct
continuation of this)
e-mail: jeffkaz@YouCanDraw |