The Supply Store
Back to YouCanDraw .Com
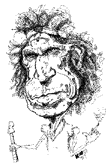
Lesson 15: Putting it all together - Case Studies |
You've arrived, or maybe you just dove in and wanted to see what this was all about. Either way, if you've gotten here step by step by going through every lesson or you've jumped from section to section, you're still going to need ammunition or at least a systematic approach in order to size up your subjects. And that will come in time. And with practice. Did I say practice? Yes, you must practice. (I heard "Ya gotta practice" all the time growing up - for whatever it was.) There's no way around it. But there are shortcuts.
Below the "Lesson 15 Master Link Page" box just below, you'll see a table with links to all the different approaches you can use when approaching drawing faces. These are merely suggestions, and are in no particular order. All have worked for me for better or worse. Scan the list and if one or two things catch your eye, click on them. All the links and content are on this sizable page. I recommend reading over all of them eventually. In later versions all of these will hopefully be expanded into much more depth - with appropriate links, and other resources.
The blue "Lesson 15 Master Link Page" link just below is your gateway to all the Case Studies and it's where you'll find the Flash Interactive Exercises. Have at it and enjoy! |
Here's your "Ammunition Box" list:
| Where do you start? | Pretending you're a medical Investigator |
About the "Ammo Box "
What I've listed here are the things I've seen taught, things I've been taught, and a few things I've figured out myself that help me draw a good face. This list is hardly exhaustive, but I think it covers the major directions with which you can approach drawing faces. If you know these will that make you an artist? No. But yes, it will help clarify things. Here's what I do - plus a few more little things.
Some of these are conceptual - that is you have to be in a "frame of mind". Other are more literal. I'm not going to go into a whole lot of depth here on any one of these, you'll get reinforcement when we apply all that are applicable in each of the case studies.
This you will learn:
You'll see there's a finite place to start.
You might even be overwhelmed at first - just like I was the first time I sat across from someone I never met before or had a really detailed picture in front of me. Baby steps. It's all about baby steps.
As you practice, as you internalize each method, each approach, you'll gain the confidence you need.
And you won't be starting on live models - only when you're ready for it. (I think it's actually easier working live than from a photo. But pictures don't criticize. Which was very important to me when I first started.)
There are so many things going on in a person's face: expression - which change as emotions come and go in an instant as fast as the thoughts race through a person's head and body - color, changing shapes, the features. Yes, it seems overwhelming at first. But there are generalizations and shortcuts you can abstract from every face. But just for fun, do you know what are the tiniest, dynamic (changing) observations you can observe within the movie screen of the face? I'm just throwing this out there so you get an idea of the scope of what you're working with.
A friend who's a hypnotherapist actually taught me to look for the tiny, instantaneous ripples, knots and twitches that pass over and through a person's face uncontrollably, subconsciously as the person crosses in and out of emotional blackwater, "making little deals" she would say. And she taught me you'll never even see these unless you learn to just watch and listen. Without judgment. You don't have to draw these, just know they're there. They can tell you something about the person. This is the face at it's most minute level (without a microscope.)
Does this help you draw? Yes and no. Knowing this can help give you insight into your subject if you know what those little twitches and ripples mean. In the larger picture it can help you decipher an attitude. In the beginning should worry that they're there? No. But know that someday reading a person this way can get you out of a jam and will only escalate your rapport and observation skills.
It's an amazing storyboard - the face that is. Never the same. But enough the same that we can recognize the same face in lots of different positions, from all sorts of angles and in 1800 different configurations over a hundred years or more.
Think of the last time you got a roll of pictures developed. You're going through the stack of pictures you just got back from the Kodak Kiosk - you open up the yellow and white heavy paper envelope with the gummy glue that stretches like hot mozzarella on the top flap and the grease pen checkmarks in the little square boxes on the front. "Glossy, no border". There are pictures of you and your friends and family in there, junior toying with the family dog or opening presents, or one of those group shots at a party or from a trip. And what's fascinating? You recognize everybody in the whole stack - even yourself - even when they say "I don't look like that". Even when you say "that doesn't look like me".
(Of course nobody ever catches me in my favorite "looking in the mirror at home practicing my best Hollywood pose shot". That's how I'd like to be photographed. Just wouldn't get caught dead rehearsing for it, right? I'd be embarrassed as heck if anybody caught me practicing in the mirror at home, or looking for an affirmation in the big display windows as I walk down the mall. I mean nobody else does that, right? How vain.)
Recognition is a complicated function of the brain - and to a certain extent we need to get distanced from tacit, passive, "just looking" and get into focused observation. That's what the first two parts of this book were about: learning to see what's right in front of your nose. Literally. So where do you start? How do you make all this stuff manageable? And what do you go after when you're caricaturing? In a word, we got to break it all down into smaller parts. When we understand those, you get a "eureka": and it eventually all comes together.
This is mostly a "gestalt" thing you feel or sense about somebody. You ask questuions like: What's most notable about this person? Is it a feature? An attitude? What in their expression seems almost constant? The trick is to look for the clues, identify the actual part or parts of the face or anatomy that clues you or you feel drawn to. If you cover that part up do you lose that impression? If someone looks surly, is it because the corners of their mouth curves down? Or because their eyebrows are low and half hide the eyes? Or is it because the skin over the glabella (that little fleshy spot between the eyebrows and above the nose) is all knotted up?
In my opinion, the real art in caricature isn't always going for the easy exaggeration of an obvious feature (it's a great place to start though). Mastery can produce a likeness that doesn't depend on exaggeration alone. I'm no master caricaturist, but you can see this in the masters. Point: try to narrow down what grabs you. Get specific. Put it into words, describe what's remarkable.
What's the basic shape of the head? Can you "abstract" a basic shape that captures the overall shape - a "format" for the face if you will? In the "shapes of the head section" (lesson 14), there's an upcoming section on cartooning. Look at those for ideas. (Note: Not uploaded as of 11/05/99)
Feature Distribution: tiny differences
Consider this: if distances between the different features is fairly constant, if the size of individual features is fairly constant, then what makes everybody so recognizable and unique? The majority of that uniqueness is in the tiny differences. Within millimeters in most cases.
Johnny Winter and James Earl Jones look very different - yet if you really analyzed all the individual differences going from feature to feature, you'd see that difference between the distance between eyes, size of the eyes, distances between teeth, length of lashes, width of forehead - these kinds of measurements are very slight - within millimeters. 99.99% of all adult head circumference measurements are within a few centimeters in size. The size range between the biggest adult nose compared to the smallest adult nose just isn't that great in absolute terms. All those little differences add up.
The word subtlety becomes significant. Twins are a great example of this. Still, when you get to know twins well, you're amazed you ever got them mixed up in the first place, (most the time anyway). Of course, when you draw caricatures, you usually don't have the luxury of years to get to know your subjects. More like seconds. Point: there are always differences. There is always something that makes an individual unique. Ferret these out and the "sum" will always be greater than the parts.
This is where internalizing and always comparing your subject with "Mr. Johnny Average Head" dimensions (Mr. Average face) becomes so important. The more you make a practice of this, the more automatic it will become. (You'll be amazed how fast you'll recognize all the little dimensions as you practice this. All the case studies will use the average face model for comparison.)
The Features: going one at a time
Look at or think of a picture of a crowd from a distance - all facing the camera (like in a stadium shot or one of those New York City sidewalk shots: the faces farther away all seem to look so much the same.) Your mission: study the the features and compare them to what you know about Mr. Average. To do that you need to know what we've outlined in the sections on each of the facial features.
Run down a list of the features: ears, eyes, nose, teeth, lips - that's a manageable list. Then look at eyelashes, color of the iris, eyebrows, shape of the shadow under the nostrils, the depth of the philtrum, the sag of the cheeks, the depth of lines around the eye's, etc., etc.. I know, it can get ridiculous! Still, working up a list helps when you're first learning - it's just a checklist.
Pretend you're a Medical Investigator
When a doctor (or PA or NP) goes to write up his or her physical exam, they go through a memorized mental list for everything they've observed: "HEENT" (head, eyes, ears, nose throat), oro-pharynx, neck, chest, abdomen, the private parts, extremities, skin, neurological exam, the lymph system, cardiovascular system, and that's just the beginning. Then there's a huge in-depth exam for each one of those body parts or functions if extra focus is needed. From head to toe. Literally.
Information about the patient comes in from all the clinician's senses too: what he sees, hears (heart and lung sounds), texture (like eczema, - is the skin warm and moist? Any rashes? Any lesions hot or red like in an infection? Vibration in the lungs, ( via touch and stethoscope), and I could go on and on. The point: this internalized list prevents the observer (in medicine or in drawing) from missing anything important. As an aside, any of you who learn to observe the way I hope you're learning here, are building skills that would put you far in front of a few classes in medical school. Seriously!
Hair, jewelry, tattoos, hats, glasses, special shirt, collars, clothes, make-up: what accessories on/in your subject grabs you? What kind of add-ons can you think of or more importantly do you observe? From hair style to skin piercing - that's characteristic of your subject?
The left side of Mr. Average's face is pretty much a mirror image of the right side. Few if anyone alive has perfect symmetry. Always compare feature's on one side of the face with those of the other. On something like a nose or the mouth (a non-paired feature), you'd be amazed how often you can point out differences if you look for them. For this I do my "radar" test: I move my vertically held pencil horizontally across the page. I do this for alignment of the features (like when I'm looking to see if the edge of the nostril lines up vertically to the inner corner of the eye) and I use it when I'm examining asymmetry.
Click here for asymmetry example.
Horizontal and Vertical Scanning - a variation on Asymmetry
Horizontal and vertical scanning: this is an exercise in asymmetry and alignment. How's it work? You use all you know about sighting (see Lesson 8 for review in sighting). But you add this little twang to it:
holding your pencil (or straight edge) out in front of you, with the pencil (or straight edge) vertical first, slowly scan your way from left to right across the picture or subject. Note how the ear lines up with the jaw, or neck or shoulder, then note the corner of the eye - how does it line up with the corner of the mouth? How does the glabella (that little fleshy area between the eye brows and and above the nose) line up with the nose? the nostrils? the lips" the chin? the top of the head? Do this all the way across the face. If you're using a viewfinder, (lesson 7), this will be all the easier.
Then you do the same again but this time with the your pencil in the horizontal position and scan from top to bottom. That is start at the top of the picture or subject and work your way down. Line up the ears: does the top of the left ear line up with the top of the right ear? Does the bottom of the nose line up with the bottom of the ear lobes? Is the mouth horizontal? Does your subject 's mouth characteristically turn up at one corner? Or is it just the angle of the picture? (If you're drawing from a picture.)
Click on the animation below and you'll see an example of what I mean. (Imagine that the edge of the gray is your pencil grading, scanning and scrolling it's way over the subject.) (You'll want to go much slower than the animation shows.)
Click here for "scanning example" - it's 83 kb, but it's fed to your browser in tiny chunks - it should load frame by frame with very little delay.
Here's the same "scanning example" animation - but much slower. Really watch for all the differnt alignments you learned in the Mr. Average Face section.
In some cases, this is going to be obvious. In other cases, it isn't so obvious - you need to compare who you're drawing to the Mr. Average dimensions. If you're doing more than one person in a single drawing, I think it's easier: you can compare each face to the other faces in the composition. If one person's nose or eye's seem noticeably larger, those are good bets exaggerating those will work in a caricature. Shrink and stretch. If you're not drawing two faces at once (which I guess is usually "business as usual"), then you need to reference Mr. Average Face (click for Mr. Average face) continually until you feel like you can recite his dimensions by rote memory.
Wherever there's a stray, an anomaly, a diversion, a departure from the "Average" dimensions, you can focus on that. (Which, incidentally is just about the entire population of the world).
The Process of Exaggeration
Sometimes it takes real study to decide what degree of exaggeration will still look like your subject when you're done drawing. The easy answer is "go for the obvious". Got a big nose? Make it gargantuan. Cross-eyed? Really cross 'em. Long neck? Make a giraffe out of them. When you're doing all your drawing in private, you can go as crazy as you want. When your'e doing a party, the rules of order are kinder - the impression you leave will bear a direct connection to how much follow-up business you generate. Some people love wild exaggeration. Others people will crumble right at your feet and if that happens, you get to play psychologist for the next 10 minutes.
So what do you exaggerate? Doing several quick sketches of your subject is usually the best way - and doing most of them "wrong" until you start seeing a resemblance is par. Remember this too: nothing is "wrong" in practice drawing, it just might be less than accurate. But it's the only way you'll route out the one or two features that really define a person's look. If the eyes look small and beady, compared to a rather large and obvious nose, exploit the contrast. If your subject has an especially thick neck and a fine, pointy chin, push that exaggeration. It's all about relationships. There's enough eccentricity even in the most "average" of faces to fill a book. Of course, again it's quite often subtle.
Sometimes drawing all the features realistically then just playing with the distribution is effective - try photocopying a picture of someone you know. Go to Kinko's and make copies at two or three different sizes (200%, 50 %, 25%, 400 % - I don't know what the copy machine limits are - they're getting better all the time.) When I say "distribution", I'm referring to how the features are distributed in the Average Face model.
Cartooning is great for getting you into that playful, abstracting state. Cartoons are also good reductions - that is they're usually recognizable reproductions because they contain and "reduce" all the different complicated sub-shapes within say, a normal nose, into a "smoothed out" abstraction.
All the basic shapes: features (ears, eyes, noses, mouth, lips, teeth) the bony structure of the face, it's constituent parts (cranium, forehead, cheekbones, maxilla, and jaw, all of these can be abstracted and played with. "Play" being the operant word here. Play is the ingredient of caricaturing that makes caricaturing so much fun - in fact it's the most necessary ingredient in getting any and all creative projects off the ground. Don't take my word on it. Try it yourself (in both drawing and other unrelated projects. I need to take my own medicine here too folks - and often.) Once you taste this, you'll be hooked!
Tracing - drawing without memory
Tracing is an absolutely legitimate move in your practice repertoire. In fact, tracing throws you into your right brain (the artistic mode) in a very real way. It's kind of a slow idle, but you're paying attention to shapes, lines, and contours in front of you and in real time. You can't access memory when you're tracing, so you're brain must process the real time, "in the now" sense information being fed to it.
The trick then, when tracing, is to go back and redraw freehand on another sheet of paper what you've just traced. Technique wise, this second move is a true modified pure contour. Tracing in and of itself is pure contour drawing with instantaneous feedback about accuracy. In fact, the only difference between tracing and drawing is that tracing is drawing without memory. Seriously, think about it. The only thing you eliminate in tracing is the period of time it takes to go from observation to recording it on your "remote" paper. People who say they can't draw miss this middle step. Why? Because they lose access to the artistic mode of the brain. Of course, you know that with practice, this middle step can be mastered. (See lessons one through three on the "About Lessons" page.)
Back-Tracking to earlier sections
Tracing also allows you to hash out the two dimensional shapes that all three dimensional pictures contain with in them. (Or can be reduced to.) "How's that?" you ask. Simple. This bring backs the idea of the picture plane we've talked about in these three sections:
2) Shapes of the Head: section 1
Shadows on the face suggest depressions in the face, or areas under an overhang like the the way the bony brow both protects the eyes from physical damage as well as cast a shadow over the top of the eyes, (depending on light angle of course.)
Shadows can be viewed as shapes (squinting really improves this perception because it obscures all the different shades of gray within in the shadow
If a three dimensional object can be collapsed on to a two dimensional Kodak camera film, (or on to your computer screen), what allows that
2-d, then going 3-d, then back again
So this is tracing's other silver lining: it's easier to identify the negative shapes - the shapes surrounding your subject. When you learn to sdThen you can reverse the process, or more accurately you can invert "negative space" and refocus on the shapes within the subject. For example, a nose sits pretty prominently on the face, and it's surrounded by shadows (which have shape) and it has it's own shapes within it: the different cartilages that make up it's anatomy. If you focus on just the nostrils, then there's going to be other shapes surrounding it that can now be treated as negative shapes. (Don't forget about using a format either! Note: if you've come directly to this part of the program, there will be lots of new terms.)
Other tidbits:
Tracing from a picture automatically converts all the 3-d real life contours into 2-d shapes.
Squinting is a shortcut: squinting can reduce a lot of detail to it's simplest shape.
Other things you can do:
Get a magazine - one with lots of celebrity shots. Cut out the celebrity pics and cut out the individual features. play with them on a piece of paper.
Web picture references
Due to copyright laws, I'm not allowed to scan or reproduce any photographs of art/subjects without the written consent of the photographer or artist. There's still lots of places to turn though. In several places throughout the case studies you'll find a handful of links that have a good picture so you can 1) draw the subject yourself and 2) see if we've captured a likeness. Enjoy.
Directions on how to use the web links: (if the link isn't underlined or in blue) Highlight then press "ctrl + C", then place the cursor in the "address" line of your browser, hit enter and you're there.
Kasbohm & Company's
YouCanDraw.com
© Copyright, All rights reserved 1997
e-mail: jeffkaz@YouCanDraw