YCD Member
Michelle L.'s |
18 January 2001
Today I we're going to look at Michelle L.'s drawings. I want to thank Michelle for her willingness and courage - it takes guts to have your artwork put up for everyone to see and evaluate - especially when you feel like you're still in the learning stage. So let's give her some applause! (You go girl! :-)
Remember also, these drawings have been scanned, twisted around in Photoshop, shrunk two or three times for emailing, plus a couple other graphic manipulations all contributing to even more "information loss" - all insults to the original. Without further adieu...
Original email:
"Hi Jeff,
This is Michelle L ... Well, I needed your
opinion on a couple of my pics. I scanned the
original and then sent you the scans, so they aren't
as easy to see as the original, but I didn't want to
part with them.
Anyway, I am having
real problems
with hair and noses. The two girl pictures are just
freehand drawings of no one in particular, the guy is a
quick sketch of a photo in a magazine. I have only
been able to draw about 20 minutes a week for the last
few months, so I am really trying to schedule more
time for drawing, because I really do enjoy it.
But, anyway, if you
have any suggestions on how to
improve my drawings, please let me know. Thanks in
advance for your help and I hope you have a wonderful and
blessed day, week and year.
~Michelle"
******************************
Response:
Hi Michelle,
per your request, here's the short version - I'll do a more extended version with pictures in next weeks email (this is "next week's email). So I'll just dive in...

Over
View of ML's pictures
Overall: I really like what you're doing - all of them. I especially like the 3/4 view (your "side girl") picture. It's the volume I really feel when I look at it.
In picture one ("front girl"): when I squint I really see the shadowing - on the right side of the picture ( the girl's left side); suggests the cheekbone very subtly and accurately.

Looking closer at shadows on the cheeks
 |
I think you did a wonderful job capturing the shadows on the nasal philtrum and on the lips. Again very accurate. (Lips are the hardest shadows on the face to capture I think.) |
Continuing on to the neck shadow - it too gives the feeling of volume. There's no doubt in my mind the light source is from the left. (See above full-face illustration.)
| The eye's have very realistic highlights and the irises are shaded just right: |  |
It's clear to me in this picture where you were in "R-mode" - the lips, the mouth, the shadows - all show significant engagement (in r-mode...you was in the zone girl!)
Two places where it looks to me where you were stepping out of it: first - back to the eyes. Not the iris and pupil, but in the outline of the eyes - I think you may have been drawing from memory a little more than from what was in front of you (something we all do when rushing or when slightly overwhelmed.)
Suggestion: go over the sections of the eye - rehearse drawing the upper and lower lids, then the "canthus" (one on the nose side, one on the ear side..canthus is just Latin for "corner") - a picture will show this better. Then look at the very subtle shadowing - especially as you get out towards the temples. (I'm throwing a lot at you here.)
Here's a couple illustrations of
just the eye outlines - note the corners of the eyes and
see if you can't see where these are a little different
from "Front Girl". (I know you're working
from a photo too - and that makes it hard since a lot of
the details get obscured).

Outlining the eye's corners
The arrow points to the outline of the "medial canthus" in the top picture; the lateral canthus (or corner), is outlined in the lower picture - it has the arrow and dotted circle highlighting it. What's notable about this area (inside the dotted circle), is that the upper lid folds over the lower lid. Look at this in real people - it'll jump right out at you when you know it's there.

Just a little more detail of an eyelid
The nose
I think the nose you drew shows
a great deal of promise - I can see you're closing right
on in where the shadows are supposed to go - both under
the nose and on the sides. You're using gentle
shading - very soft pencil strokes - to represent the
coloring that occurs there.
|
Recall you can look at the nose as a "wedge", and it wedges it's way into it's resting place over two large bones in the face - the maxilla and the cheek bones (the "zygoma" bones}. In the illustration below the maxilla is the largest square-like circle shape at the bottom; the cheekbones are represented by the wide and narrow block in the middle of the face: |


Looking at the nose as if made of wedges
When you look at enough noses, you'll see the shadow areas that mark this transition (from nose to face) - are shadow areas versus sharp lines of division. Don't confuse that statement with using lines, or cross hatches to represent the shadow areas. You've done the latter - used lots of little lines to fill in the shadow area. And this is exactly right. (You can also draw the shadow shape as a contour before coloring it in.)
*To review noses in general click here.
*To see how the nose fits in with the rest of the face look about half way down this next page (just click on this big long address and it'll take you right to the page):
http://ycdinsiders.digitalchainsaw.com/InsidersArtistLoft/section7a.htm
Another note: recognizing shadows as shapes is easier to do when you squint - that way your mind groups together all the different shades and tones as just one "shadow area". Part of your mind will argue "well that won't look right", but when you do it, amazingly it works.
For 20 minutes a week you're doing fantastic Michelle!
Next picture: "Quick sketch guy"
Like I said in an earlier e-mail, this guy is just beaming with energy! The lines are strong and dark, the expression is a close-up study of "in -your-face".

Quick Sketch Guy
There's more detail in the eyes
than in the first drawing - I can see the little fold of
the upper eyelid better in this picture. This gives it
depth and adds to the spherical feel of the eye. You've
also suggested the medial canthus on the nose side of the
eyes. Well done!

Compare the
corners of these eyes with the
same corners of "Front Girl"
More notes. You're zeroing in on the main parts of the nose in this picture as well. On to the lips. Again the upper lip is very accurate, the corners of the lower lip meets with the upper lip as a plane - though the main body of the lower lip could be a little "pulpier", i.e. rounder - nothing a couple of well placed shadows couldn't fix (to give it a little more of that "figure-8-on-it's-side" look). Or better yet, some vertical lines etched right into the lower lip. Not only can these add a sense of fullness, but they're also true to life: real live lips have all sorts of small, subtle vertical lines.

Here's what I mean by vertical lines - I've clipped the lower lip of Rolling Stones drummer Charlie Watts to illustrate this idea. Click on the "Charlie Watts full picture" link to see how the lips fit with the overall shadowing and cross-hatching scheme.

Charlie Watts
lips
************************
Picture 3: Side girl
I really like this picture! The left eye (our left) is just enough larger than the other eye to suggest it's proximity - i.e. it's closer to us and so it should be bigger. And it's exactly big enough to give that illusion. The far eye is proportionately closer to the nose. See how the "medial canthus" of the eye on the right (Side Girl's left eye), appears to touch the nose, again amplifying the 3-d feel of it:

"Side Girl"
You've captured the shadowing Michelle - especially on the nose-side of the eye that's closest to us - it puts the eye ball right into it's socket. All your shadows are subtle...makes me think of Sade, you know, the singer...I don't know why, it's that smooth, subtle feel I guess :-)
The lighting and shadowing around the left eye (Side Girl's right eye), is right on. This really tells us the light is coming in from the right and from above (our right and above). Our right, her left...sorry if that gets confusing.

The highlights on the cheeks and
chin make me see the front of the face as a coherent
plane - that's a very effective unifying thing. The
shadow on the side of the face from side of chin up to
the forehead totally underscores the fact that the face
and head are cube-like in shape. Very well done!

Shadows on the side accent the front plane of the face
You also place shadows on the side of the neck and at the hair line - the hair line where it meets the forehead and face...very accurate and effective.
Which brings me to one of your
questions: how to draw the hair. I can tell by how you've
identified the hairline shadow, and other shadowing
you're drawing what you see: you're in r-mode.
"Pizzazz" sums up your lines you put down for
hair in this third picture! Those lines got energy! May
be it's impatience, or just spontaneity - whatever you're
doing - they work. You're on to it here Michelle.
Drawing Hair
The difficulty with drawing hair is that to make it look realistic, you have to either make lots and lots of lines or at least "suggest" lots of lines. And those "lots and lots of lines" have to suggest shapes that fit on to the underlying egg shape of the top of the skull. What are those little shapes that fit on to the underlying egg shape of the skull? Pretty much the primitive shapes: cylinders, pyramids, squares, eggs - all coiled over with lines like an early 20th century model radio spool.
A Spool?
Think of a spool of sewing thread - the kind you might have seen your grandma using to sew up pants or socks. A roll of black thread has that same shimmering highlight right down the middle. Hair has the same kind of highlight. Even if you don't sew, buy a couple spools of thread, close one eye and look at the highlight change as you roll it around or rotate it in front of a light. Hair acts the same way - straight or long, curly or straight.
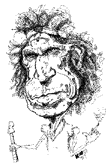
Look at this weeks John Goodman pix - and see if you can't see the "tubes and coils", and cylinders and little spirals in the hair.
But this isn't to overlook that fact that a head of hair has an overall shape to it: Mohawk, beehive, bouffant, male pattern balding, pony tail, corn-rows, Afro, "bazooka Joe", Dorothy Hamill, Pippy Longstocking - all suggest the larger overall shapes and all those overall shapes are still comprised of the little sub-shapes we talked about above. Squint again to see the larger shape. Look a little closer to see the coils and waves.
See Maria Shriver-Schartzenegger to see the primitive shapes, you know, the spools - or to see all the little lines. Tons of lines! Look at Lyle Lovett - again lots of lines. And this is only one way of doing it. It's a little more tedious but it's great cross-hatching practice. And pencil and cross-hatching go hand in hand. (All the greats mastered it).
I think I'll go into more depth on the hair in the next communiqué in two weeks - this one is getting too long :-).
Back to the Nose
And it's cross hatching that can really help add realness to the shadowing of the nose. It's obvious to me you're getting in to the artist's mode when drawing - your noses really show a lot of promise Michelle! Again I think it's after looking at enough of them you'll see the patterns appear - this doesn't cause you to draw a referenced nose you've archived in your brain, but it does allow you to see where the landmarks are on every face.
As I mentioned above, the nose actually spans over several bones - the cheek bones and the maxilla first and foremost. Anatomically the cheekbones actually rise up to form the lower rim of the eyes. And you can see this in a face: there's a transition between nose and eyes. There's an actual physical landmark in the skin that suggests the underlying juncture. It's called the "orbital-nasal groove" - big name for "eye-nose" groove. This is the little crescent shaped line that runs in a quarter circle down from along the nose to out sideways under the eyes.
You can get an idea from this next picture where the "orbital-nasal groove" sits - which is below and distinct from the lower lid of the eye:

Side box: I forget who this guy is, (somebody "Downey", Morton maybe?). Had a TV talk show in the late 1980's, kind of like the the Jerry Springer show. He had a nasty smoking habit - which made for really dark rings around his eyes - and he really jumped on his guests. Very entertaining guy though and he always eased up on his guests by the end of the show. (Made "buddy-buddy" with everyone - after he beat them up on national TV.) Colds and nasal allergies will also cause pronounced, darkened orbital-nasal grooves. Look for them in any of your friends with a sniffle.
The same can be said of the margin between nose and mouth Here the skin fold is called the "naso-labial fold". Note how it (the naso-labial fold), runs from the side of the nose, past the lips, and all the way down to the chin in older folks with stretched, loose fitting skin. In younger healthy people the naso-labial fold pretty much stops at a level parallel with the corners of the mouth. The repeated bunching of the skin and fat by the "smiling muscles" causes it to grow deeper and deeper as we age. This is true of all wrinkles. (By the way, "labial" is Latin for "referring to lips".)
There's a gradual transition in the space between these two lines (between the orbital-nasal groove and the naso-labial fold), and so is best drawn in shaded tones versus hard lines. And you're already doing that.
Reducing the shapes of the nose to just a few lines
The second drawable part of the nose in a front view is
the tip and nostrils - Look at these two links for front
views:
Click for Front view of the nose - on this page, you'll have to scroll down until you see a front view of the nose (it's only half drawn so you can draw the other half like in a "vase - face" drawing) .
Also check our some of these super quickly drawn cartoon noses. See how they've been abstracted down to a total of two or three lines - one line suggesting the tip of the nose, and the other two representing the nostrils. From a full three-dimensional nose reduced to three lines with the shading omitted all together. (Remember, the brain will fill in the gaps if there's enough correct information given.)
All in all Michelle, your noses are coming along quite nicely. I see just a touch of confusion over where to draw a shadow and where to draw line - I'm referring to the base of the nose and the nostrils (the base is where it comes to rest on top of the lips, the root is where it pops out of your forehead. Some anatomy books switch the nomenclature around - but that's what I stick to.)
So homework: Draw, even trace to begin, both hair and noses. Review the anatomy of the nose and eyes but most of all draw. Even though there's not a lot of specific exercises in those sections (I'll be adding a lot more in the next revision...which I might get to before 3000 AD...), but close in on where you fee like you're weak and dive in - give the troublesome sections a little extra attention. I'll bet if you really tried, you could squeeze in 2-3 more drawing sessions each week. I know you can do it!
*************************
Links
For noses:
http://ycdinsiders.digitalchainsaw.com/InsidersArtistLoft/masterlinknoses.htm
To see how the nose fits in with the rest of the face:
http://ycdinsiders.digitalchainsaw.com/InsidersArtistLoft/section7a.htm
(Scroll down to about the middle of this page and look at "Let's keep moving". Look at the shape of the nose with the number "3" written over it - look at how it fits in with the cheekbones and the maxilla. Note the nose here has no sides - only a narrow plane representing the front of the nose.)
Long addresses to links:
Maria Shriver-Scwartzenegger:
http://ycdinsiders.digitalchainsaw.com/InsidersArtistLoft/shriver_maria.htm
Lyle Lovett:
http://ycdinsiders.digitalchainsaw.com/InsidersArtistLoft/lyleLovett.html
So not to worry - I'll have this illustrated for you Michelle next week!
Keep on drawing.
Warmly,
Jeff
**********************
Michelle L. writes back:
"I just wanted to say thank
you for helping me on my
drawings. I didn't imagine you would go to this
extent , but I am glad you did and I know it will help
others with their work. I better get back to work.
Thanks ~Michelle"
Kasbohm & Company's
YouCanDraw.com
© Copyright, All rights reserved 1997
e-mail: jeffkaz@YouCanDraw