 The Supply Store Back to YouCanDraw .Com |
The multi-talented right brain The right side of the brain is multi-talented. You were introduced to and you experimented with one of it's skills above: recognizing shadows as shapes. Shadow recognition can also be extended, telescoped if you will, into pattern recognition: organizing those loose chunks of form into a recognizable whole out of that data. As I mentioned above, extrapolating meaning from scanty information is a skill the brain literally takes pleasure in performing. Like getting the punch line of a joke it seems the right brain is able to build the bigger picture out of the relationships suggested by the pieces. It does this without even asking it to.
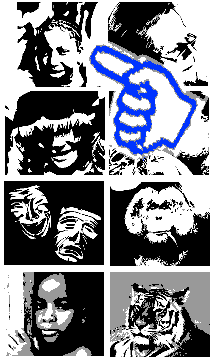
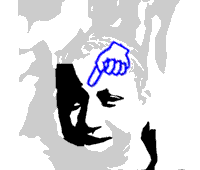
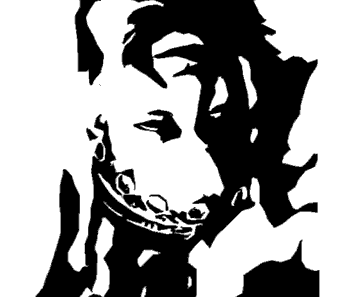
Look at the eight pictures on this page, (above and below). How does your brain make sense of these? Look at figure 1 for instance. Your brain starts out seeing a pattern of shapes, then there's this moment you feel something subtly bubbling out of the chaos - that is you feel something happening, (though it's more in retrospect that you recall the feeling), and then, almost like a little hiccup or a burp it crystallizes as a nameable picture. "Girl with rings in headband". That's what I get out of figure 1. How would these look to a person with brain trauma? To see how a person with brain trauma might view these pictures - as a group of random shapes - they can make no sense out of them. Click on each picture for a larger view and then click again on the "upside-down" view link. I guess you could flip your monitor, but that's probably not real practical. Not to worry, these are small pages. Here's your mission: learn to see the random shapes as just that: random unrecognizable, un-nameable shapes even when the pictures are right side up. Look again - you want to be clueless Just for fun, you might want to look at the upside-down pictures again. (Click on your browsers "back" button so you'll come right back to this section.) I've placed links to them here in random order so you can get that feeling again. What feeling is that? The feeling that you're entirely clueless about what you're looking at. You want this state. Check them out one more time - and use your browser's back button, not the "back" button that's offered: click
here for upside-down version 1 Finding the crack in the egg Confused about what we're trying to accomplish here? Let me repeat it. Your brain normally has a built in pattern recognition skill. It's a function of your R-mode or "right brain". We eventually want to circumvent this function consciously and at will. That is, we want to suspend the brain's desire to understand the picture. You want to urge L-mode off on it's merry way and stop r-mode at it's first impression. When you do that, all the smaller, nameless shadow shapes remain foreign to your brain - your brain can't categorize them. If it can't categorize the shapes it sees, it can't reference your memory of similar shapes. If you can control that step, you can maintain in-the-moment, "real time" observation. This is what artists are good at. This is exactly what Zen meditators try to do. But you don't have to put any religious connotation on it at all - it's a naturally occurring function of the brain. And you're going to get good at it too. Time for an assignment, (after the next six pictures).
Click here to see just the eight pictures (no text)
Figure's 7 and 8 have an added feature: there's a total of three colors rather than the two (black and white) of the first six. The extra color in these two? A medium shade of gray.
Click here to see just the eight pictures (no text) Assignment: pinning down shadows Materials. As usual, paper and pencil will do fine, but I want you to try this with a heavy black magic marker or even with India ink or black poster paint if you have it. (It's easier and faster to color in those areas of space with a marker or a brush swipe - penciling can take too long.) So, if you're feeling adventurous, get a small paint brush - a number 7 would be great. One of those paint brushes that comes with those kid's water color sets will work just fine too. Just 30 minutes Read through the directions before you start. Set your timer for 30 minutes. If you can't set aside 30, try 15 minutes. Just dabbling for a few minutes now very often gets you over the resistance of doing it again next time when you have more time.
Pick any picture
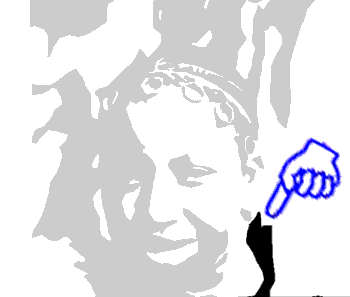
Start by drawing one shape - then move to the next
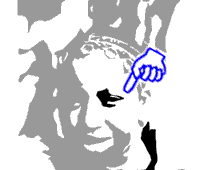
Move to the next shape
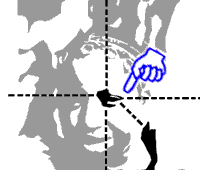
Reckoning shape location
Move to the next shape - and draw it
Same drawing without a format:
follow In retrospect - see how far you've come In this step you want to see how much your drawing resembles the original. In earlier exercises we were more concerned about getting the feel of getting into R-mode. It's time now to introduce the idea of accuracy - not that you have to reproduce anything with accuracy but just be aware of it. And don't sweat it, it can take many drawings (caricatures included) to really get an accurate picture. Accuracy will come. So, take your drawing and go to the page with upside-down picture of the original. Flip your picture over so now they're both upside-down. Evaluate the shapes you've drawn against the original's. Run your eye along the border of each individual shadow shape and note where they're alike. Note where they're different. Again, your picture doesn't have to be anywhere near an exact replica - just learn to identify the areas that are different. Flip your picture. Find a right side-up version of the original. Be aware of how a slightly exaggerated shadow changes the expression of the entire picture. Interpretation is highly subjective but certain expressions are universal: a tiny extra angle at the corner of the mouth might make a smiling face into a scowl. Inaccurate highlights in the pupils shifts the gaze or makes the drawing look cross-eyed. A male subject may look female. And if you find all those kinds of mistakes and more - that is fantastic! Yes, fantastic because that's how much clearer you've learned to see the world. You're in a position now to make those distinctions because you've gone through the earlier lessons, done the exercises, and you've built an "accuracy monitoring system" into your observational skills. You're learning to observe with precision. Do you think this stops with just caricatures? You're learning skills that range over whole other aspects of your life. Word. Kasbohm & Company's YouCanDraw.com © Copyright, All rights reserved 1997 e-mail: jeffkaz@YouCanDraw |


