Back to Eyes: Finishing Touches Part I
The Supply Store
Back to YouCanDraw .Com
Eyes: Getting into more detail - The Finishing Touches: Part II |
In this section you'll be observing and drawing:
- The "Hairy" eyebrow;
- the Bony Brow;
- Eyelashes;
- the eye "bags";
- Crow's feet.
After completing this section, the second of two on details of the eye, you're going to have covered all the basics: from the minute (pupil highlights) to bony structure around the eyes. You can carry on your own personal observations of drawing and capturing eyes ad infinitum. But I believe if you've been following the lessons closely, you'll now have all the basics covered.
In part one you took a closer look at recognizing the basic parts of anatomy, at combining them, and at adding depth to your renderings by adding shadow and more detail. In this section you're going to explore the areas peripheral to the eye - i.e. you'll be looking at the areas around the eye. Specifically, eye lashes, eyebrows and even the eye "bags"- the "infra-orbital"area. So here's an overall quick illustration of those surrounding parts:
Detail around the Eye
Review this picture and see if you can't find and mentally isolate the parts you've already learned to draw. Using the negative space technique you've been practicing, visualize those areas around the lids as whole new shapes. Look at them until they "pop" into their own as unique, stand-alone contours.
So, one more time, here are the five or so areas of detail:
The Eyebrows,
The Bony Brow (or the bony overhang),
Eyelashes,
The Infra-orbital fleshy area: (the "bags" - I'll just refer to these as "bags" from now on - unless this offends any of you - let me know).
And lastly, you'll take a quick look at one final area of skin wrinkles: "crows feet".
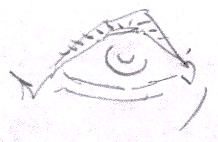
Eyebrows
Let's start at the top of the above illustration. The eyebrows. The brows are graceful arcs of hair. They follow the the most anterior (forward-reaching) margin of the the frontal bone (the forehead). They're great for exaggerating, and for representing gestures. They're upside-down "U" to flat "V" in shape. They can be a very gentle "S" shape as well. Some are full and thick, some disheveled, some down right artistic in appearance.
Women's eye brows are generally finer and better defined left to right. Guys have a lot more hair between the brows - and can almost have a "single" brow that spans from the left side of their head all the way across to the right side in a single swipe Women generally have less hair mass than guys, and more space between eyebrows - but this is no hard and fast rule. (My advice to you, after you give these eyebrows here a good look, is, as always, look at real world examples.)
Look at these two examples of eyebrows, Rodney Dangerfield and Walter Mathau:
Look at the shape of Rodney's eyebrows.
And below, Mr. Mathau's - note the span of the brows: from just above the nose, curving over the eyes, then down the outside edge to almost the "crow's feet".
Walter Mathau eyebrows
Right now, with your finger feel your own eyebrows. Feel especially for the bony brow behind it - beneath the actual hairs (the frontal bone). Don't the eyebrows map quite close to the bone? (This works best with a relaxed facial expression.)
Combining sight and touch
Look in the mirror while you examine your brow. Pay attention to the information you're getting through touch (feeling the rim of bone, smoothness and pliability of skin and the texture of hair) and sight - watching your finger palpate over the arch of the bony brow, the eyebrows, all the way over to your nose. Alternate your concentration between what you see, and what you feel.
Isolating the shape of the hairy eyebrows. (I'm calling these the "hairy" eyebrows so you don't confuse them with the "bony" brow underneath them.) I've highlighted the eyes a shade of red here in PhotoShop. This articulation of the portrait is called a 3/4 (three-quarter) view. Two other views you could use are profile (like in the foundation lessons "vase/face" exercises) and front view.
Three-quarter view is just a view of the head somewhere between profile and front view.
Three-quarter view of
Walter's
eyebrows
Here I've isolated the eyebrow's. I've added a little extra distance between them Imagine you see the rest of the face forming around these brows.
Isolated eyebrows in "3/4" view
Here I've made a copy of the right brow and reversed it. So in essence, you've got a pair of brows in a frontal view. In reality, most people have asymmetry from one side of their face to the other. That is, they're not mirror images of each other. We'll be doing a short section on symmetry below.)
Front view of eyebrows
Assignment: Using what you know about pure contour, modified contour, negative space and "vase/face" drawing techniques, I want you to do one drawing of eyebrows using each technique. Go for it! dive in. I know you can whip this right out. That is do:
Incorporate a format. Model the rectangular format around this drawing - and use this illustration for the assignment: Draw this eyebrow |
A primer on the masses around the eyes:
In this next picture I've drawn some of the masses that meet at the eye: the forehead, the bony overhang, the cheekbone, and the nose. (We'll be getting onto the masses of the head very soon - so this is just a tiny intro):
Locating the edge of the brow
where the Eyebrows are found
In this picture, I've circled and placed an arrow over the area of the right* brow. Notice how the forehead peaks at the eyebrow and then recedes back towards the eye? And the cheekbones rise out beneath the eye?
(* I use left and right relative to the left and right of the face being looked at in the picture - in the way the picture would describe it's own eye. This how medical people - doctor's, PA's and nurses - describe left and right: always in terms of how the patient would describe the part: "my right eye" in this case).
A Quick Exercise
|
Nature seems to have supplied us with natural protection. Does it work? Think of how many times you've hit your forehead or cheek or have been hit by a ball, an object, or another angry person (well I hope you haven't experienced that) and afterwards you had to reply "that almost got me in the my eye!". It works!
(*I use left and right relative to the left and right of the face being looked at in the picture - in the way the picture would describe it's own eye. This is how medical people - doctor's, PA's and nurses - describe left and right: always in terms of how the patient would describe the part. "My right eye" in this case).
The area between the eyebrow and the eyelid
The area between the eyebrow and the eyelid forms this kind of pouch shape (albeit a hard pouch - hard because it's bone):
The bony overhang of the brow
Here's the same picture with this shape highlighted in red (the area of the brow in the picture above shadowed red with little white patches - but it's still all of the brow (squint and you'll see the shape I'm talking about):
Bony overhang with
red highlight
And in this next illustration, I've isolated it even more:
Isolating Rodney's bony brow
Look at the bony brow in this study of Walter Mathau's right eye (the area above the upper eyelid and below the hair of the eyebrow). This is the right eye. Compare the general shape of each (Rodney's and Walter's - Rodney's is the left eye) ). Notice how the bony brow surround's the eyeball from the temple area to the nose and the eyebrow surrounds that:
Walter's right eye
Here it is again - the bony brow or negative space between the eyebrow and the eyelids - highlighted in a light blue for clarity:
Highlighting Walter's
bony brow
Now look at the brow as a negative space. Then look at it again as the object - when you do this, the eyebrow and the top eyelid become the negative spaces. Note how their shapes share contours.
Isolating Walter's
bony brow
I've isolated Walter's bony brow even more in this picture (immediately above) just like in Rodney's picture . Don't worry That we're "splitting hairs here, i.e. getting into too much detail. I want you to get a feel for the major shapes in the facial features. When you learn to look for these, you'll be able to go anybody else's portrait or caricature book and see right into their drawings and recognize the anatomy behind the features. You won't have to try to guess where one area starts and the other begins - you'll know!
Guess what? Yep. Time for another drawing. ( Did you really think you were going top get away without doing another drawing? Ha!) Seriously, tying down what you've just learned by actually getting involved with it will increase your recall and fluency of it by 400 to 500 percent. Gospel.
Assignment: Using what you know about pure contour, modified contour, negative space and "vase/face" drawing techniques, I want you to do one drawing of the bony brow using each technique. I know you're' on a roll since you probably just did the eyebrow drawing exercise above, right? If not, jump in now. :-) That is, do:
Again, don't forget to incorporate a format. Model the rectangular format around these drawings - and use these illustrations for the assignment: Draw these bony brows: In the next illustration, I've combined both of the above bony brows into one picture. It's artificial but it exemplifies the kind of asymmetry individuals will have from one side of their face to another. Scroll back and forth from the Rodney and Walter pictures above and see how fast you can pick out the bony brow of each. Then sketch this drawing. |
Look at this picture
Hopefully it will make more sense to you now. Pick out the hairy eyebrow, the bony brow, the upper lid, the lower lid, the eyeball, the iris, the pupil, the highlight within the pupil, and the "canthii":
Identify the anatomy you've learned, and...
...remember you're working in
three dimensions
Some final details
Ok. Here's a couple of last second details: the "bags" of the eye (the infra-orbital area) and the eyelashes. I'm not going to go into great detail here, you can explore this more on your own, but here are the basics.
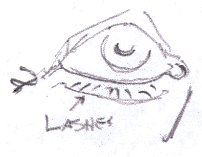
Eyelashes: Unless a person has huge, monstrous eyelashes, where they're a defining characteristic, you're probably not going to have to worry about them too much. Women are generally drawn with larger lashes than men are. They add a little more of a feminine touch.

Isolating the lashes from the eyelids
The top lid's lashes can often be represented as a "brush" border like they're shown above. Depending on your subject, individual lashes will be a better choice. Don't get into the habit of relying on memory. The object here is to build a visual shorthand that serve to enhance your powers of direct observation.

Upper Lashes

The lower lashes
If you look at eyelashes from real close up, you'll see they're in rows almost like shark's teeth, which accounts for their "brush" appearance. "Brush" rather than single hairs like in the picture above. If you just make an area of shade on the edge of the eyelid, you'll often have enough of a suggestion of eyelashes to suffice.
Eyelashes often bundle together and look like thick hairs. This is the effect I'm trying to accomplish in the picture below. By pressing hard on the pencil and then releasing as you quickly withdraw the pencil tip you can make the same marks.
The Bags around the eyes
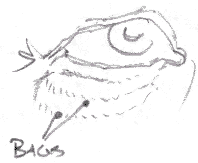
Making sense of the "Infra-orbital" region. (Infra = below, orbital = eyes. Infra-orbital = below the eyes) the "bags". By looking at this illustration, you can see how the globe fits in it's cranial space. The yellow bracket shows the space that's covered by the lower lid, the orbicularis oculi muscle, and the "bags".

Since the skin around the eyes is the thinnest in the body, it's very susceptible to swelling. If you're "retaining water" or you're just getting out of bed in the morning, your eyes will be puffy. The combination of water swelling and the organization of the muscle underneath accounts for the "bagginess" of this feature of the eyes. As people age, the "bags" become more pronounced - the collagen and "elastin" that keeps your skin tight as a youngster starts to get stretched, flaccid and saggy. It's a great source of character.
![]()


Note the "x" pattern
If you take really close-up look at the "bags", you'll notice there's a "criss-cross" or "x" pattern in the skin. Part of this comes from the crisscrossing of underlying muscle groupings: the muscle is organized in bundles that pull at angles of up to 90 degrees from each other. Go to the mirror and from a relaxed expression, slowly squint your eyes to narrow slits and you'll see the "x" pattern and rolling/bunching of tissue form literally "right before your eyes". Also note how this bunching and wrinkling blend right over to the "crow's feet".
So guess what? Yep. Give these a little sketch time. Just like above do left and right, do enough so you can almost do them from memory. (Like half a dozen). Then, add them to the nearly complete eyes you drew above.
Final
Assignment: Drawing the complete |
Draw 6 more eyes (left or right) drawing them with what you've learned here in mind:
Include exaggerating the curve of the lids so the eyeballs' roundness becomes almost palpable. (a big word for "sensing through touch" - like you can almost feel it.)
Add the shadows at the corners (by the canthus - experiment until you sense "sphere").
Include all the other elements you've learned so far: pupil, iris, highlight, upper and lower lids, the "canthii" (the corners), the eyebrow, the bony brow, the bags and the crows feet...you have most of this memorized already if you been doing the assignments, so this should be fairly easy.
Lastly, do a "vase/face" mirror image drawing of each eye you've completed. Don't forget what you've learned in negative space and modified contour.
This is a big job to do from memory - but consider it an open book exam. Go ahead and look at the various sections if you need to. I didn't make links to any of them because I want you to push yourself a little here. You Can do it!! You Can Draw.
Kasbohm & Company's
YouCanDraw.com
© Copyright, All rights reserved 1997
e-mail: jeffkaz@YouCanDraw