Skill Number One: the
perception of edges In this lesson, you'll be concerned with the perception of edges. The lessons before today were designed to evoke several things. For instance, experiencing the conflict between the brain's different modes of operation (namely between the visual and linguistic modes), that was the purpose of the vase-face drawings.
Next, in upside-down drawing, the point there was to demonstrate you already had drawing skills - that if you could just quiet or side step your language dominated left brain, you could uncover/discover this skill idling right under the surface. Today's exercise - the first skill of drawing: seeing edges Today's exercise introduces you to getting a feel for the first skill of drawing: seeing and really perceiving edges. It's amazing how much the world offers in terms of details - if you can just quiet your thinking brain long enough to appreciate them. You don't have to go far to appreciate beauty in nature. In fact, it's not just within your reach, it's literally in your grasp - in fact it IS your grasp. Your palm to be exact.
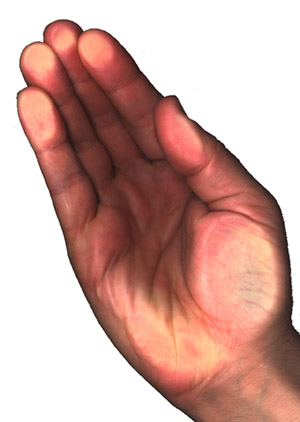
On with the lesson Today you're going to draw the lines and edges in your palm - these are complex shared edges and contours. Lesson Four in the book uses an open palm, but here's a view of your hand that's even more interesting: the crumpled up, bunched up, really wrinkled up view. Here's what you do Just for fun sit down, cup your hand like you see in the picture below - so you get that crumpling up effect of the palm's lines. Now focus your concentration on any one line in your hand. Any wrinkle. Follow it's course into the next wrinkle or line. In your hand or in your palm, these "wrinkles" are more than just mere wrinkles. They're shared edges. "Shared" because they're the meeting place of two rolls or bundles of skin. At least that's what most of the large wrinkles in your hand are.
And if your near vision is good enough look into the actual parallel lines of your fingerprints - to the point where you can almost see little canyons and river bends, even a graininess in them. Pretty amazing, isn't it? Just when you thought you hit the bottom level of detail, a whole new layer seems to open up. Instead of calling them a "bunch of wrinkles", try not to name anything at all. That is, try to avoid words altogether. Trying to label these lines in your palm is a left brain way of naming and grouping and thus a "writing off", a denying, a halting of perception, a move towards preventing any new information from coming in. Seeing the detail without naming it allows you to perceive in a fresh new way. OK. Time to draw... Time to draw So get out your timer, your pencil. Tape down a sheet of drawing paper to your drawing table. Now with your pencil on your drawing paper, turn AWAY from your paper. And yes, keep your attention on your folded-up palm. Track any one wrinkle with your eyes. As your eyes track down that wrinkle, record on your drawing paper that exact little tiny section of wrinkle / shared edge you just moved your eyes over. But don't look at your paper. Move your eyes millimeter by millimeter down that wrinkle (note: there's about 25 millimeters to the inch :-).
Do the exact same thing with the next wrinkle / line / shared edge - record each tiny little section your eye traverses with a corresponding mark on your paper. Try to copy it as accurately as you see it.
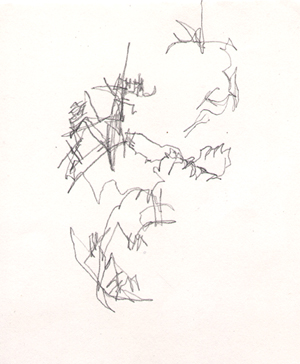
Again, do all of this without looking at your paper. As you get in to this, you'll begin to appreciate more and more detail, more curves and angles and subtleties. In fact you'll suddenly and deftly find yourself in quiet fascination of all that you're seeing. These tiny lines, angles, dips, curves and contours become beautiful. When this happens, you'll know the switch has taken place - you've gotten onto your real-time, in-the-now, visual, spatial, non-linear "right brain". You're really drawing! Resist the urge to look at your drawing paper until the timer goes off. Then give it a look! You might not know what the heck you're looking at at first, but in the next instant you'll know. Curious and complex marks - yes, and definitely nothing you'd conjure up out of your "thinking" imagination. One last note Rather than burden yourself with drawing your entire hand, just focus in on an area about a square inch or two in size. That way you can really dive deep. Here's my drawing Pretty foreign looking! "That's my hand?" I'm asking myself. I can still sort of tell it's a drawing of the wrinkles in my hand - but it could be a whole lot more. (It makes me think of those Chinese rice paper drawings just before they add the color.) How could you ever conjure up a drawing a like this? Not without accessing a whole different perception of the world! -)
Finished
Pure Contour drawing of my hand - actually
© Copyright, All rights reserved 1997-2003 |
 Take a moment more to look deeper. Look for
other smaller wrinkles there, other bends and twists.
Look deep enough until you start seeing the actual
fingerprint of your hand - right there in your palm.
That's getting to a fairly deep level of
observation.
Take a moment more to look deeper. Look for
other smaller wrinkles there, other bends and twists.
Look deep enough until you start seeing the actual
fingerprint of your hand - right there in your palm.
That's getting to a fairly deep level of
observation.